Gear No.2

It took quite awhile to finish the first gear for this clock. The second, being only slightly smaller, took just as long. With the style of work I do there’s a direct correlation between the time spent on something and the quality of the end result. I knew this gear design would take time, but once these are planted in the clock, mirroring the motif of the overall piece, I think it will be worth the hours.


I don’t think there are any other single parts for this clock that will tally this many hours. That should mean more progress to show every week going forward. I’m really looking forward to making the perpetual mechanism for this one. Maybe that’s next. Fun stuff ahead!

2nd wheel progress

Just a quick post this week. I’ve been grinding away at the 2nd gear and plan to be finished with it next week.


Once this gear is finished, along with a couple of pinions, I’ll know the exact distance from the center of the clock to the center of the escapement. Then I can use that to figure out the exact scale of the overall clock, which will allow me to being working on the rest of the piece.

2nd wheel

Gear number two is cut and spoked.


The one I finished last week has 180 teeth and was cut from 1/4” brass. This one is a little smaller, only 150 teeth, and was cut from 3/16. While the thinner material was easier to saw out, it was also scaled down and the details were even smaller. I had to use a very thin 4/0 jewelers saw blade in a few spots. In some areas I even used magnifiers while sawing it out.


I’m looking forward to sculpting this one. Both of these gears will be very visible once the clock is finished, so I’m really taking my time with them.


More next week!

Center Gear

The first piece of the new clock is finished!


I started the fabrication of this clock with what might be the most detailed and time consuming component. This is the center gear, which as the name suggests will be squarely in the center of the clock, right behind the hands. It took about three weeks to sculpt, which is by far the most time I’ve ever spent on one gear. The human eye loves repetition, so I decided to mirror the design of the clock right in the spokes of the gear. 


I’ve started working on the 2nd gear, which will be ticking alongside this one. It’s a little smaller and thinner, but will have the same design.

Gear almost finished

After two weeks of sculpting away at the spokes of this gear with a grinding tool I’m still not finished. This will officially be the longest I’ve ever spent on one gear…by a lot. And after all is said and done there will still be those who ask “Where do you buy your gears”. 


As you can see from the pictures I’m getting pretty close. There’s still one spoke to be finished and I’ll want to refine everything. I can’t wait to apply the patina to this gear and let the depth come out, but you know, patience and all that.


Next week there should be a finished center-gear, along with the start of the 2nd gear in the train.

Center gear sculpting

Most of last week was spend with a jewelers saw in my hand. This is easily the most intricate thing that I’ve ever cut from a plate that’s 1/4” thick. I needed to go slow too because with thicker material it’s important to make sure the blade stays perpendicular. Being a little off can create a taper that makes the design too thin, or even nonexistent on the back side.

Late Saturday evening I finished sawing out all the spokes. Sunday I began to sculpt the design with rotary grinders.

In last weeks post I mentioned that I might put paper inside the little windows to directly mirror the clock but I’m actually leaning toward leaving it out. Having such a direct copy of the clock in the gears would be a little too obvious and even runs the risk of looking a little silly. If I leave the paper out the mirrored design is something interesting to find or notice rather than getting beat over the head with it. It also allows me to get a lot more sculptural with the carving tools since I won’t have to leave the back flat.


Can’t wait to finish this gear! 

First Cuts

The fabrication begins!


To kick things off with the new commission I decided to go right for the good stuff. This is the large center gear that will be on display right in the middle of the clock. 


As I started cutting this rather intricate design into 1/4” brass with a handheld jewelers saw I agonized over a question that frequently pops into my head - What did I get myself into?


I’ll have an answer in about 18 months.


The silver chunk of aluminum from the first two pics is a faceplate that I can mount on the lathe and then bolt the brass blank to in order to turn the O.D. and cut the teeth. I should’ve taken a wider pic of the blank mounted on the lathe but hopefully you get the idea.


The design really is a tricky one for me to cut out. I’m pretty good with a jewelers saw but this one is pushing me. Like most good things it’ll just take more time. I’m pretty excited about this gear design. The human brain loves repetition so having the overall design of the clock repeated in the gear spokes should work well aesthetically. I think I might even put paper and tiny painted numbers in the windows.


Since there’s some overlap between the beginning of this clock and the daunting task of packaging and shipping The Grasmere Commission the posts will be a little sparse until the beginning of April. Then I should be back to my usual every Monday progress schedule. Until then I’ll work on “Perth” every chance I get.


Thanks for following.

Bridges & Gears

Now that all the gears, cams and levers are worked out for the perpetual calendar mechanism, I was able to design the bridges that hold the arbors all those parts pivot on.


With previous perpetual clocks I didn’t need to design bridges, because the two plates behind the mechanism would hold all of the arbors, and the parts were cantilevered out front. But with this piece the giant wheel of moons spins where those arbors would need to be. So the arbor for each part is between the front plate, and a bridge, which is essentially a mini plate just for that part.


The other thing I worked on is the gear-spokes for the 2nd and center gear. I was already pretty happy with the way the design of the bridges came out, but I stumbled onto something with the gear design that has me pretty excited.


I drew a few designs at first. Some of them looked like the spokes from “Perpetual No.1”, in which there are small recessed panels that mirror the number frames of the clock face. The other designs looked more like the gears from “The Grasmere Commission” or “Twisted Twelve”. Either direction would have been really good. But then I had the thought to not just pull from design motifs in the clock, but mirror the clock itself in the gear spokes.


The result is what I hope will be my favorite gears yet. The drawings are still on the loose side, but this direction is definitely something new, and something I’m excited about.

Mechanism design

This week I sat down with a pencil to figure out all these tangled mechanisms.

Yes…a pencil. That’s my big fancy tool. Creating these mechanisms is, above all, a design process for me. No CAD or solidworks. Just lots of drawing, re-drawing, and refining. I use the light table and a protractor to look at the levers in different positions of their amplitude. This is to not only check that they don’t run into each other, but also look at the shapes to see how they visually interact. It’s a sort of back and forth balancing act that hopefully leads to a mechanism where all the shapes and angles look good and flow together, no matter what position everything is in. 

The drawings piled on this disaster of a work surface include:

-The lever that works off a cam on the hour-hand, clicking a 24 tooth ratchet once an hour. Almost everything works off the rotation of that 24 tooth wheel, so things are very mechanically busy in that area.

-The great lever. This controls the calendar hands, telling them how many days to jump forward. Also attached to this lever is an arm with gear teeth on the end of it, which moves the gear train of a drag-fan that slows and softens the action of the mechanism.

-The day click. This simply bumps the hand for the day of the week forward one click with each rev of the 24 tooth wheel

-The moon-gears. Of all the drawings this one looks the simplest, but it’s actually kind of interesting and unique (for me) to this clock. In order to make the moon as big as it is, I had to make the moons span the entire mechanism. The four moons will rotate inside of a giant gear that spins around the center axis behind the whole perpetual-calendar dial. Those gears work off of the 24 T ratchet, reaching out and down through the front plate to engage with the big moon gear.

I’m admittedly not very good at explaining this stuff with type. It’ll be easier once it’s made and I can show pictures or video.

Next I have a few small clicks and stops to design, and then I have to design the bridges that hold all of these mechanisms in place.

The great-lever & drag-fan arm.

The day-click.

The lever & click that advances the 24 tooth ratchet wheel.

The moon-gears

The Beginning

Not long after the start of the new year I got to work finalizing the design and drawings for my newest endeavor. A six-foot-wide wall-hung clock, complete with a perpetual triple-date mechanism and a shadow moon-phase display.

The word “perpetual” means that it will keep track of the date and automatically account for the number of days in each month, including leap year. The term “triple-date” is because it displays the day, date, and month. And “shadow-moon”…well, I’m not sure that’s even the technical horological term, but I’m calling it that because rather than the moon moving through a window to show the phase, the moon stays stationary, and a shadow will move in front of it to show the phase.

Fun fact, normally the shadow would travel counter-clockwise, because that’s how the shadow appears to move across the moon if you’re viewing it from the northern hemisphere. However this clock is for a client in Perth Australia, and they actually see the shadow move in the opposite direction. So for that reason I’ll be reversing the gearing so that the shadow moves clockwise across the face of the moon.

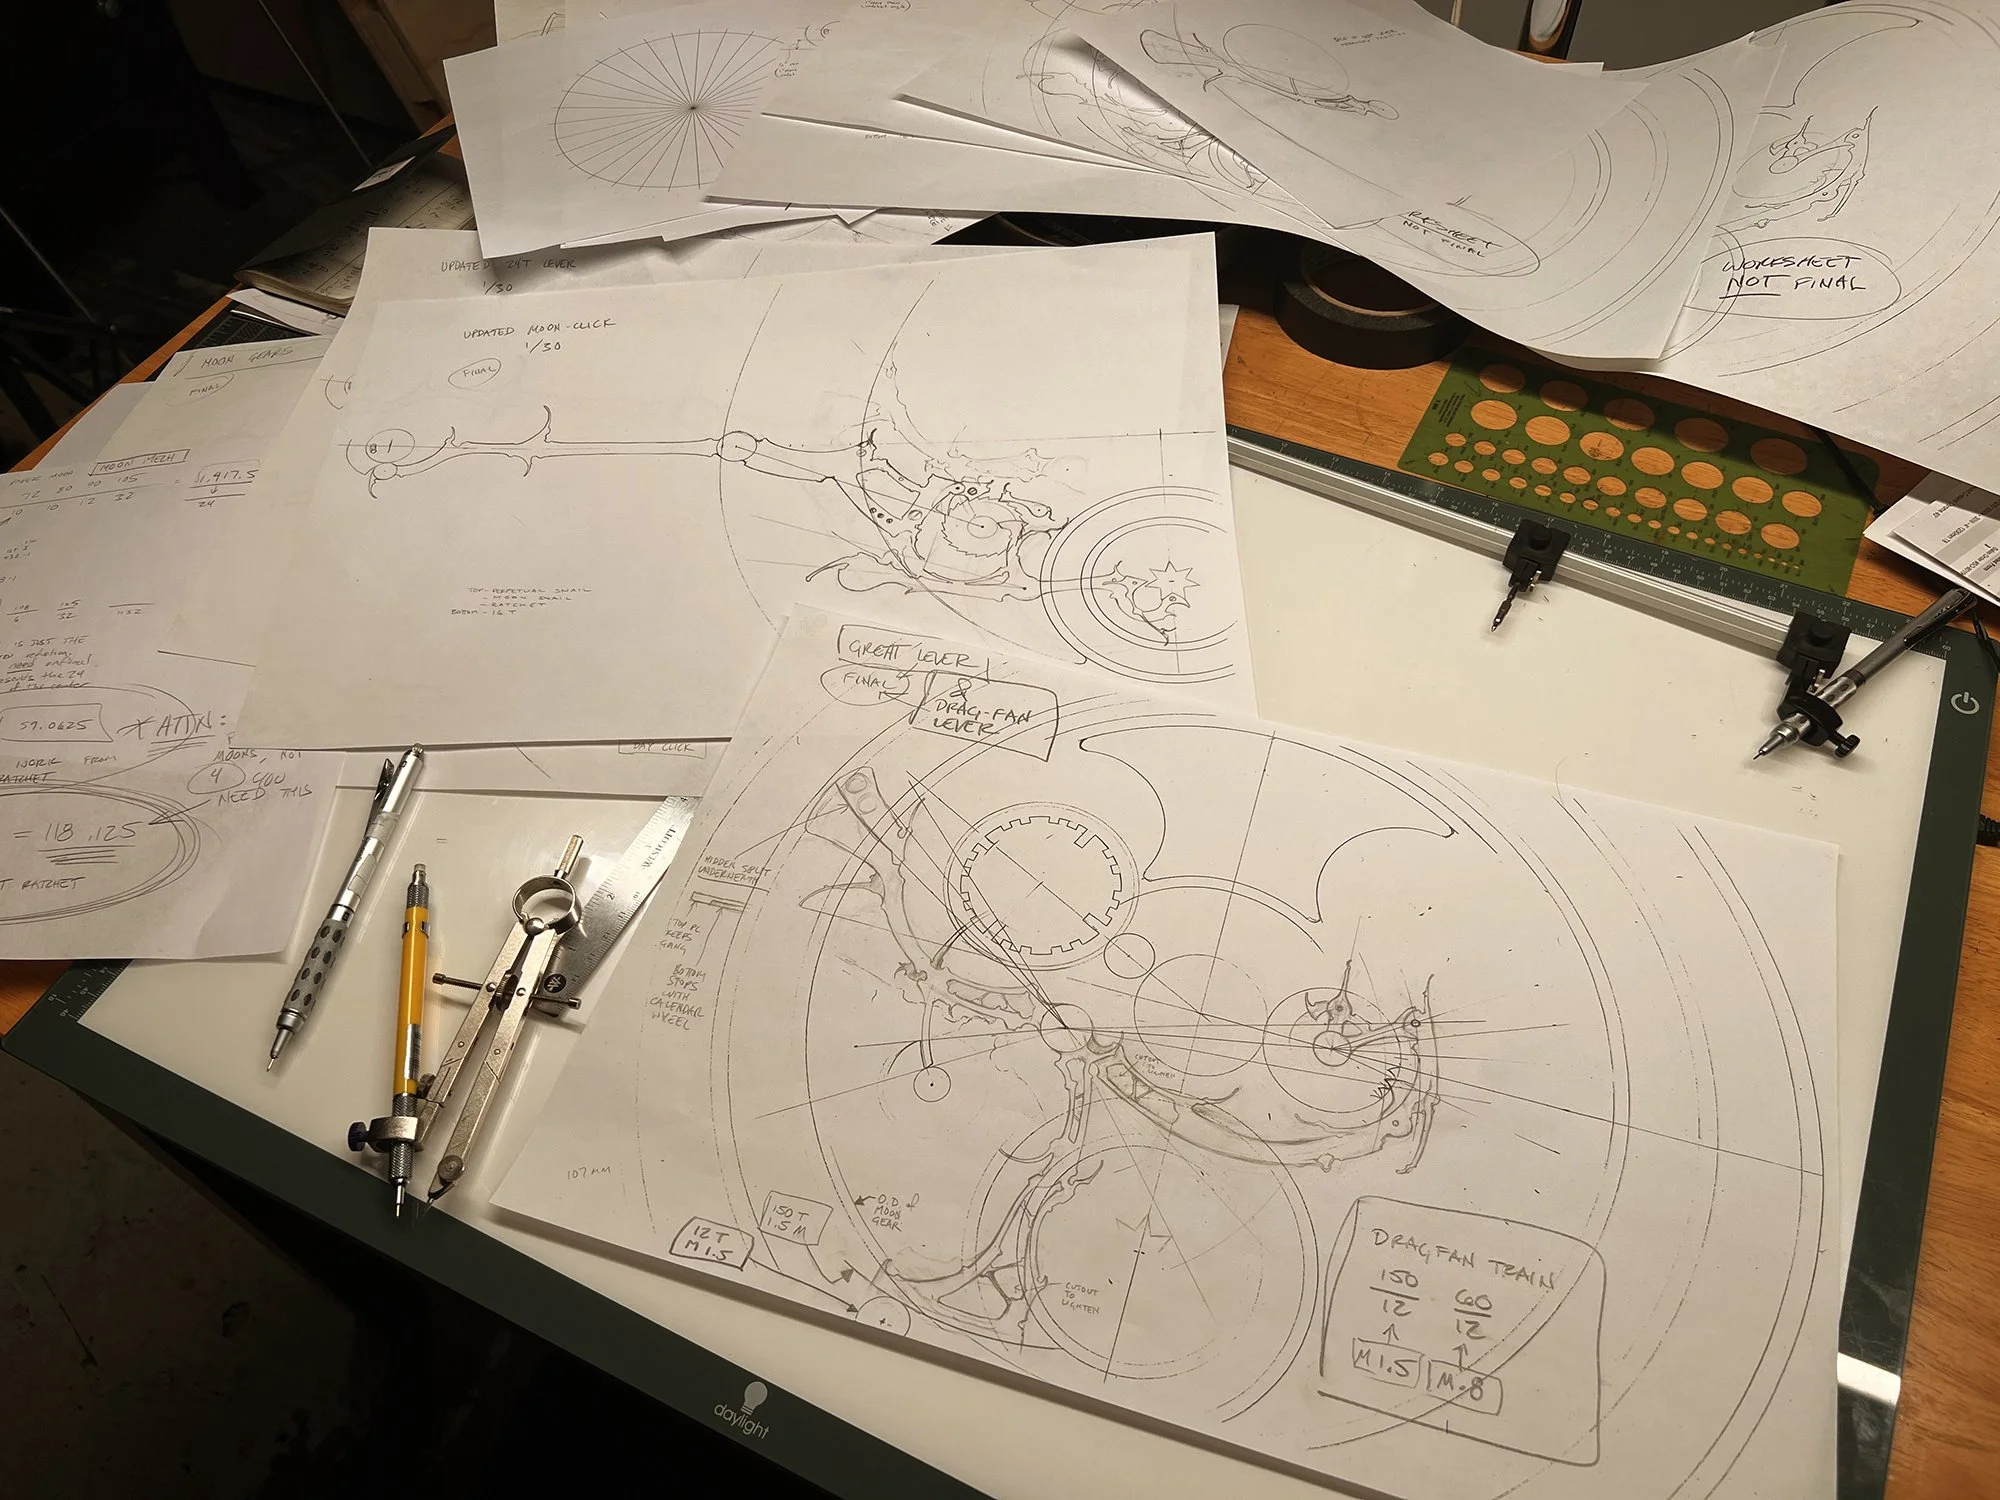
One thing of note, mechanically speaking. The placement of the moon is particularly challenging. The shadow will need to sweep through an area that normally has all of the arbors for the cantilevered perpetual mechanism. There’s also a set of gears for the drag-fan of the great lever that usually go where the shadow now has to be. There will be some bridges, unique looking gears, and general mechanical gymnastics necessary to pull of this display.

Good thing I like a challenge. This piece will be well worth the extra work!

Here are is the drawing for the new project. There are two versions - One with hands and one without. I always draw the final without hands so I can clearly see everything that needs to be cut out.

All of the progress for this piece will be posted here. More sparsely at first, since I’m still handling the filming and shipping of my last project. Eventually posts will be once a week.

Hope you’ll follow along.

Thank you & enjoy the creation of “PERTH” !!!